After you enable the track changes function in Microsoft Word, every edit you make will be highlighted in a different text and style to differentiate from the original text easily. It’s quite a handy add-on when you with multiple authors on the same document.
Enable Track Changes in Microsoft Word
Before you start making changes or sharing a document with someone else, you must enable the ‘Track Changes’ option for the document. Step 1: Open any document in Microsoft Word. Step 2: After you are ready to track changes, hit the ‘Review’ tab at the top.
Step 3: Select the drop-down button beside ‘Tracking.’
Step 4: Click ‘Track Changes,’ and you are good to go.
If you want to share a document with other team members, hit the Share button in the top-right corner and copy an editable link.
You can start making changes to the document, and Word will highlight all the new changes in different text colors and styles. Even when you delete the text, Word will strikethrough the sentence or paragraph and keep it visible in the document. You can check the screenshot below for reference.
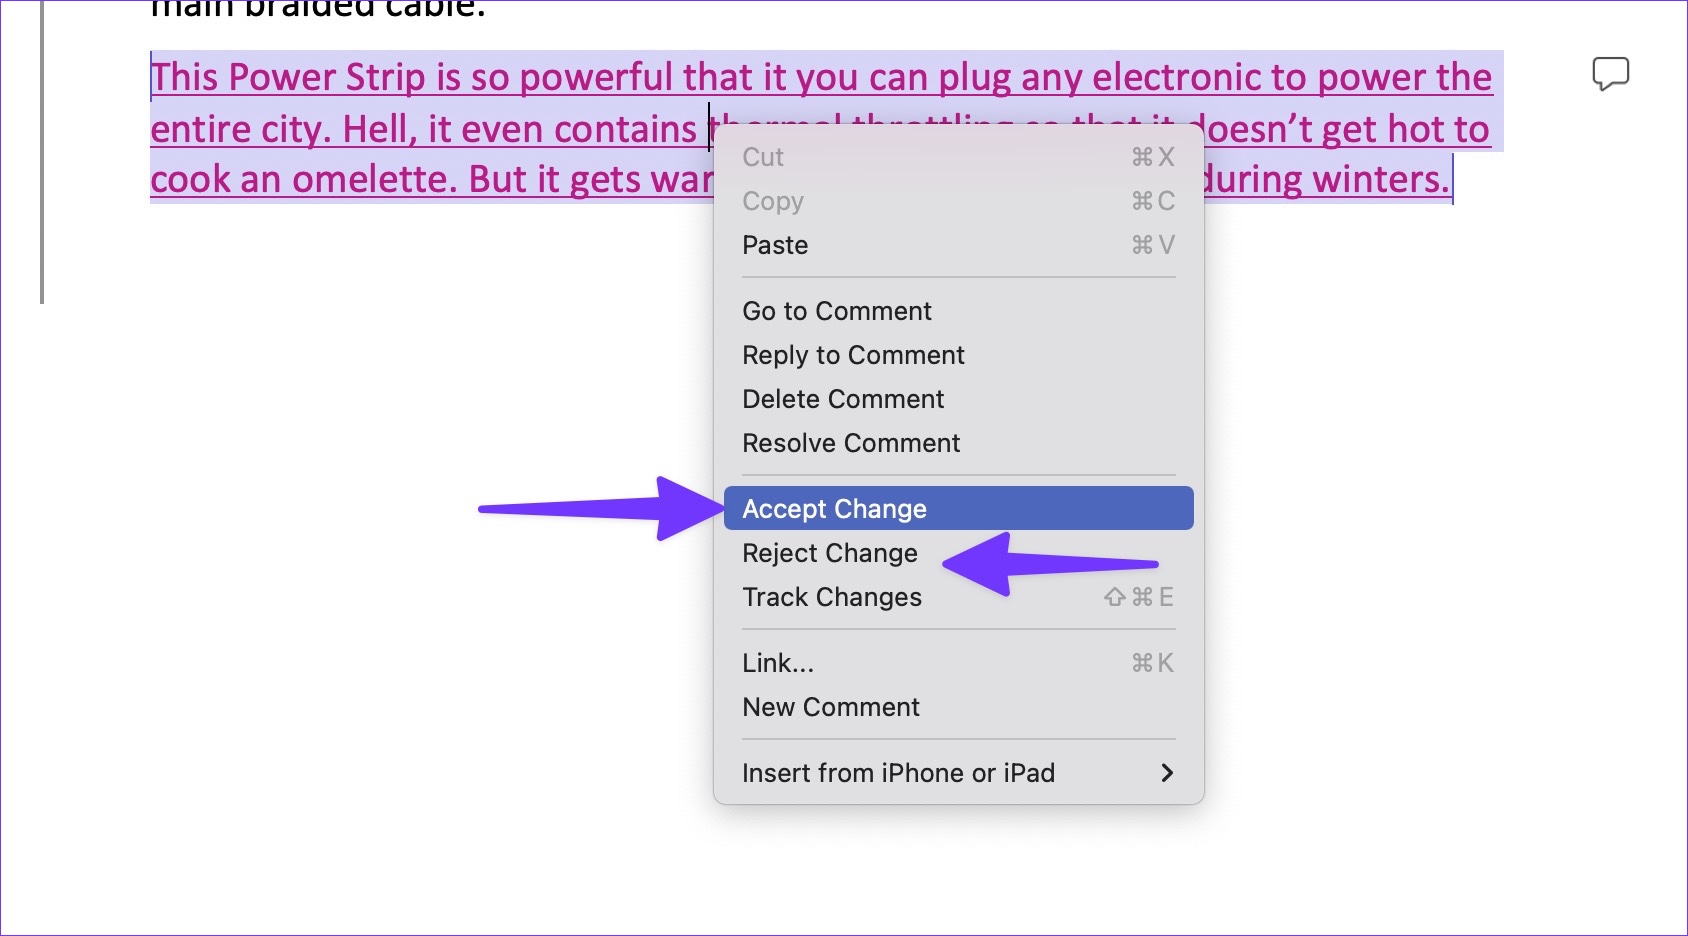
Accept or Reject Changes in Microsoft Word
The ‘Track Changes’ function comes in handy when you share the Word document with team members or colleagues. You can track every edit and add or remove it from the document based on your preference. Here’s how. Step 1: Open a Word document on your desktop or web. Step 2: Check the highlighted text in the document. Step 3: Right-click on the text and select Accept Change or Reject Change.
Repeat the same throughout the document to get the job done. For some changes, you may want to add a comment for clarification or suggestions. Step 1: Select text or paragraph in a Word document. Step 2: Right-click on it and select ‘New Comment.’
Step 3: Enter your comments and select send button. Word will highlight the text or paragraph for others to check the comment on it.
Adjust Markup Options
With too many changes and comments, your Word document might get crowded and bloated to look at. You can customize markup options based on your preference. Step 1: Open your Word document and select the ‘Review’ tab. Step 2: Select the drop-down arrow beside ‘Tracking’ and expand markup options as shown in the screenshot below.
You have four options to choose from. Let’s check them out.
All Markup: It’s the default option and will show all the changes and comments in different text and styles. Simple Markup: It will hide all the changes in the document and enable a red bar beside them. You can click the red bar to track changes and approve or reject them (refer to the steps above). No Markup: As the name suggests, the option will remove all markup and comments from the document and deliver a clean look. Original: You can check your original document before turning on the Word track changes option. Microsoft Words shows all the tracked changes by different authors in a document by default. At times, you may want to track only your changes and not get distracted by edits made by others. Here’s how you can filter your changes in a Word document. Step 1: Open a Word document and select Tracking from the Review tab (refer to the steps above). Step 2: Select the down arrow beside the Track Changes option. Click Just Mine.
Change the Way Track Changes Display
If you don’t like how the tracked changes look in the document, you can easily customize it using the steps below. Step 1: Open the Tracking menu in Microsoft Word (refer to the steps above). Step 2: Expand Mark-up Options.
Step 3: You can disable ink, insertions, deletions, and formatting. Step 4: Expand the Balloons menu and enable a different styling to track changes in Word.
Step 5: You can open preferences and change track changes style for insertions, deletions, changed lines, and formatting. You can also select different color options for authors.
If you have enabled Balloons in the same menu, you can change the preferred width and margins. Make necessary changes and close it.
Track Changes in Style
The next time you share a Word document with anyone, don’t forget to enable ‘Track Changes’ for a smooth review process. How do you plan to use it in your workflow? Share your suggestions and experiences in the comments section below. The above article may contain affiliate links which help support Guiding Tech. However, it does not affect our editorial integrity. The content remains unbiased and authentic.


![]()